Testing the VPC we deployed in Part 2
Today in the third and final installation in our series we will be testing the VPC using the instances we deployed last time, to ensure everything is working properly. We will then enable internet traffic to the private subnet via our NAT instance, enough talking, let us get started.
(Sorry for the delay in this post, my other blog www.littlekiwibus.com has been taking a lot of my time recently leading to pebkac being neglected :-( )
I was using Windows10 as my OS for this guide which made puttygen necessary if you are using a Linux distro or MacOS you can skip the first 4 steps. Instead of putty to ssh, you can just use the inbuilt terminal! (I have since swapped my primary OS to Linux Mint so no longer need putty and puttygen). To download Putty go http://www.putty.org and make sure you include PuttyGen.
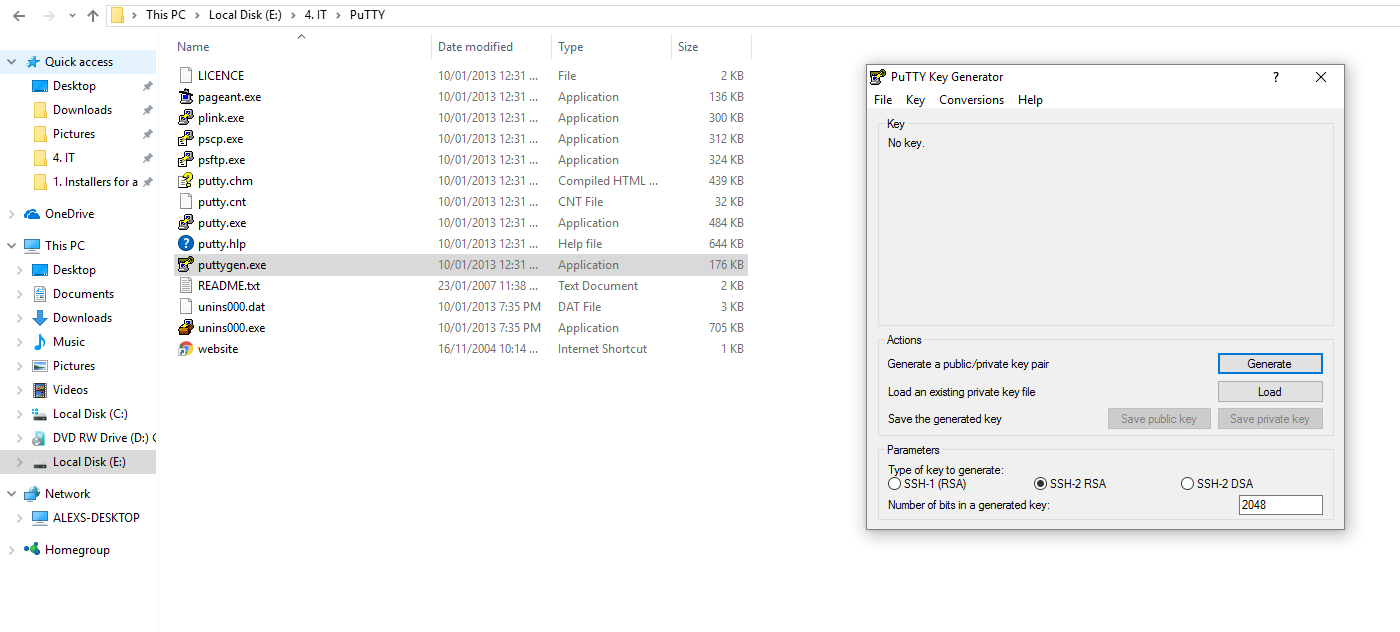
Below we see the Putty Gen GUI, you’ll want to “Load” your .pem file supplied by AWS, click Load, and locate your .pem file.
You should then see the following.
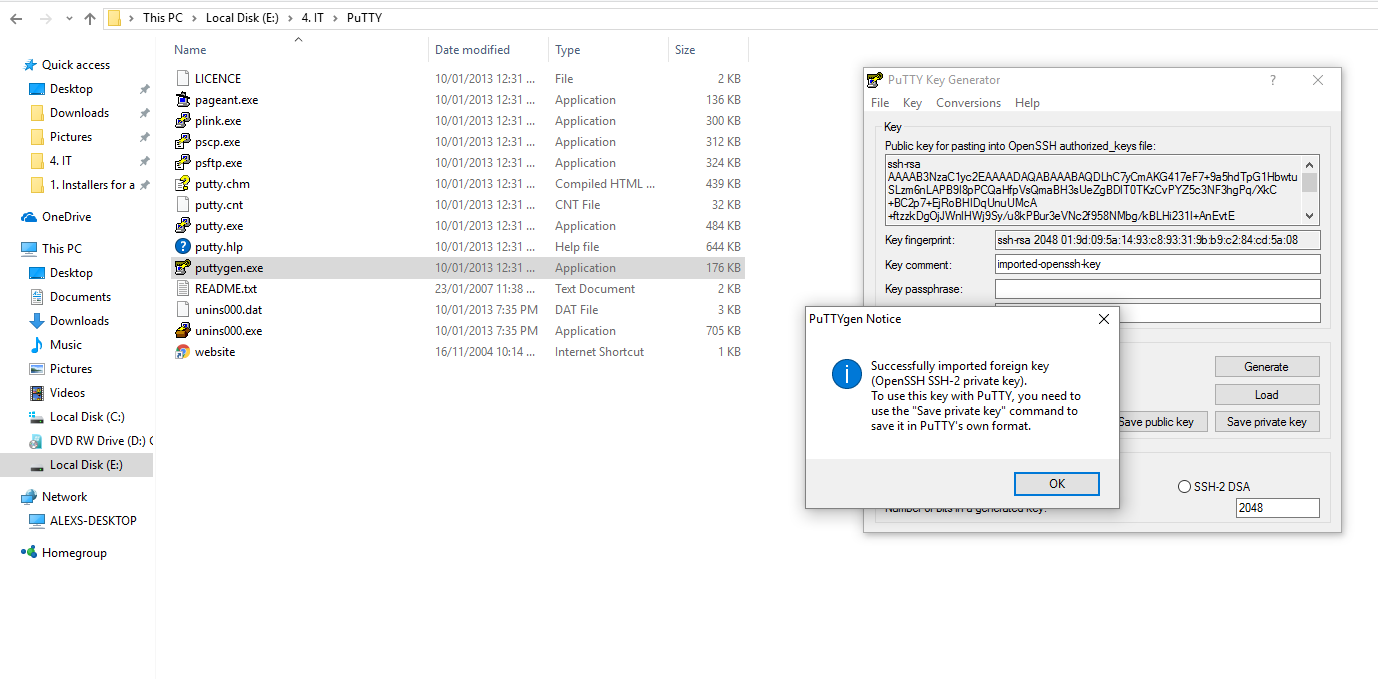
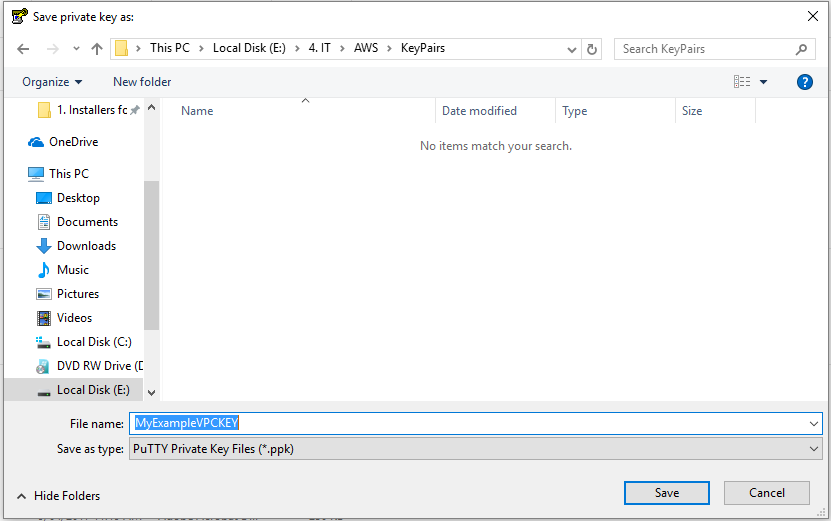
Then click “Save private key”, you can add a passphrase to it if you like, for these purposes I did not.
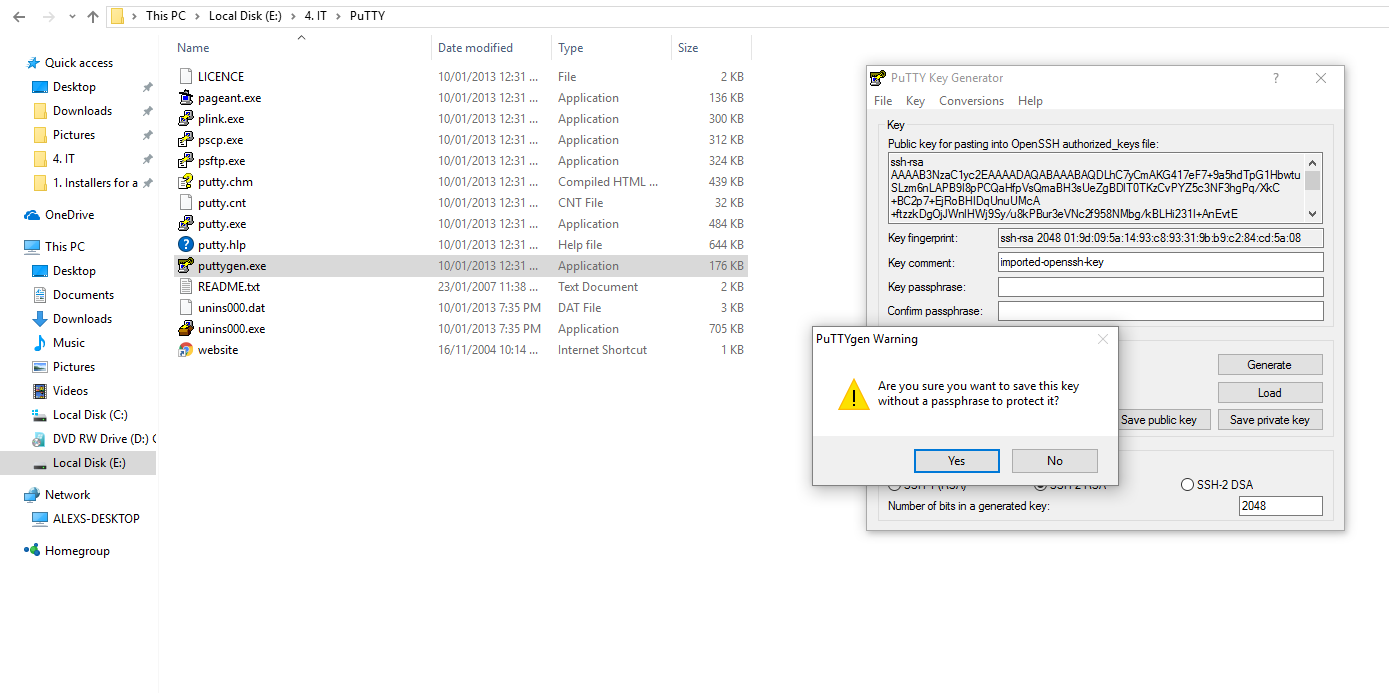
Save your key as a .ppk format somewhere safe for later use.
Now we open Putty.exe, the Putty GUI looks like below.
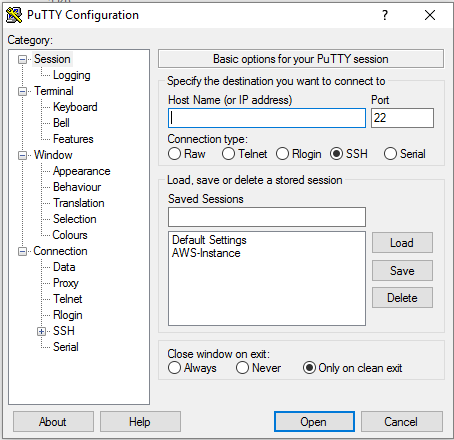
Navigate down the window on the left and under SSH you will find the Auth section, select Auth.

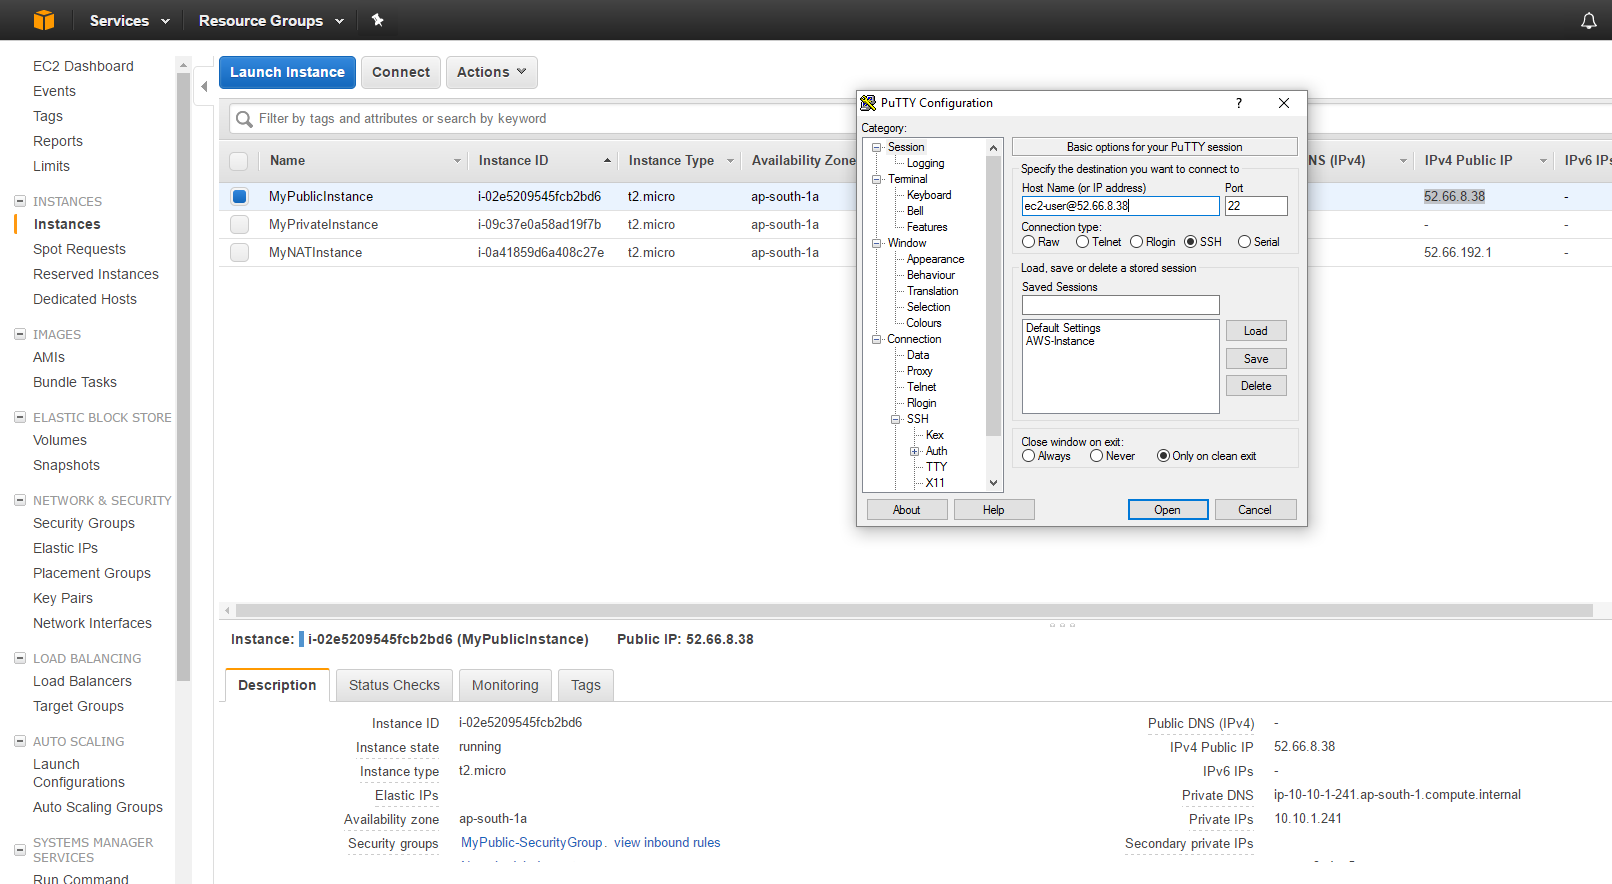
Now jump back to your AWS console and the “Session” window of Putty. Find the Public IP address of your “MyPublicInstance” in AWS (in my case 52.66.8.38), prefix it with “ec2-user@” (in my case ec2-user@52.66.8.38) and type this into the “Host Name” text box back on the main window of Putty, then click “Open”.
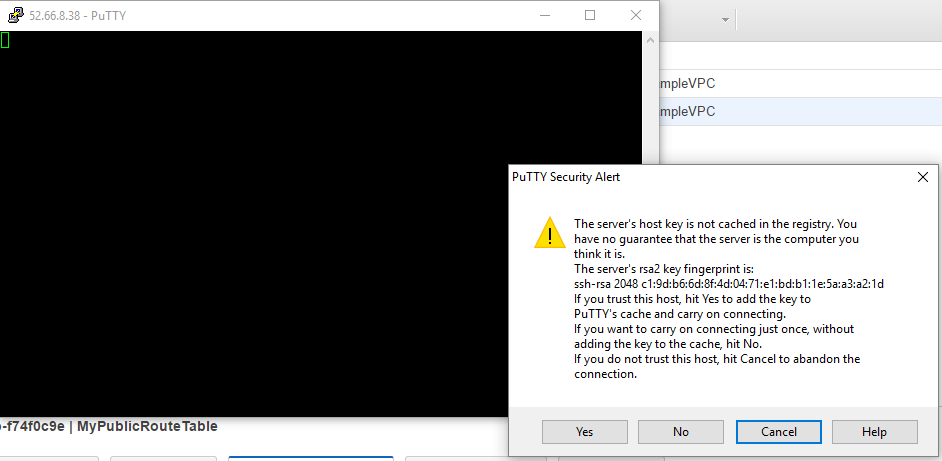
You should now see the below Security Alert, click “Yes” to accept the certificate.
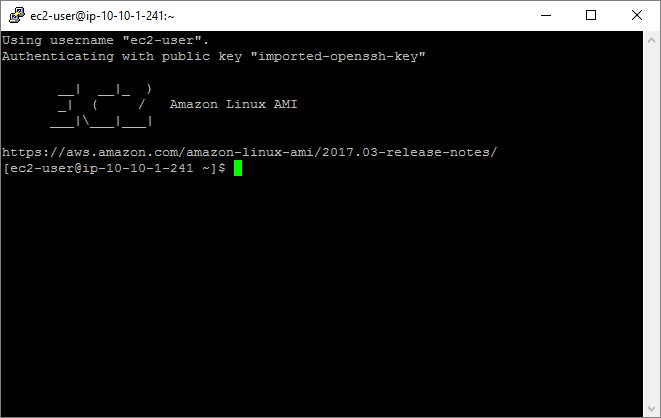
You should now see the SSH session just like below.
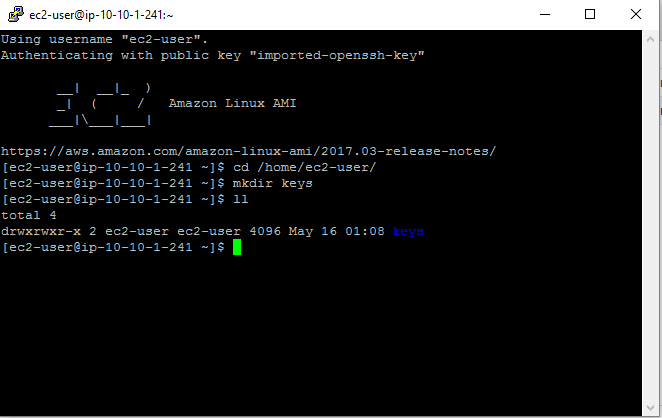
Run the below commands, to create a key folder for later use. cd /home/ec2-user/ mkdir keys ll Your output should match the screenshot below.
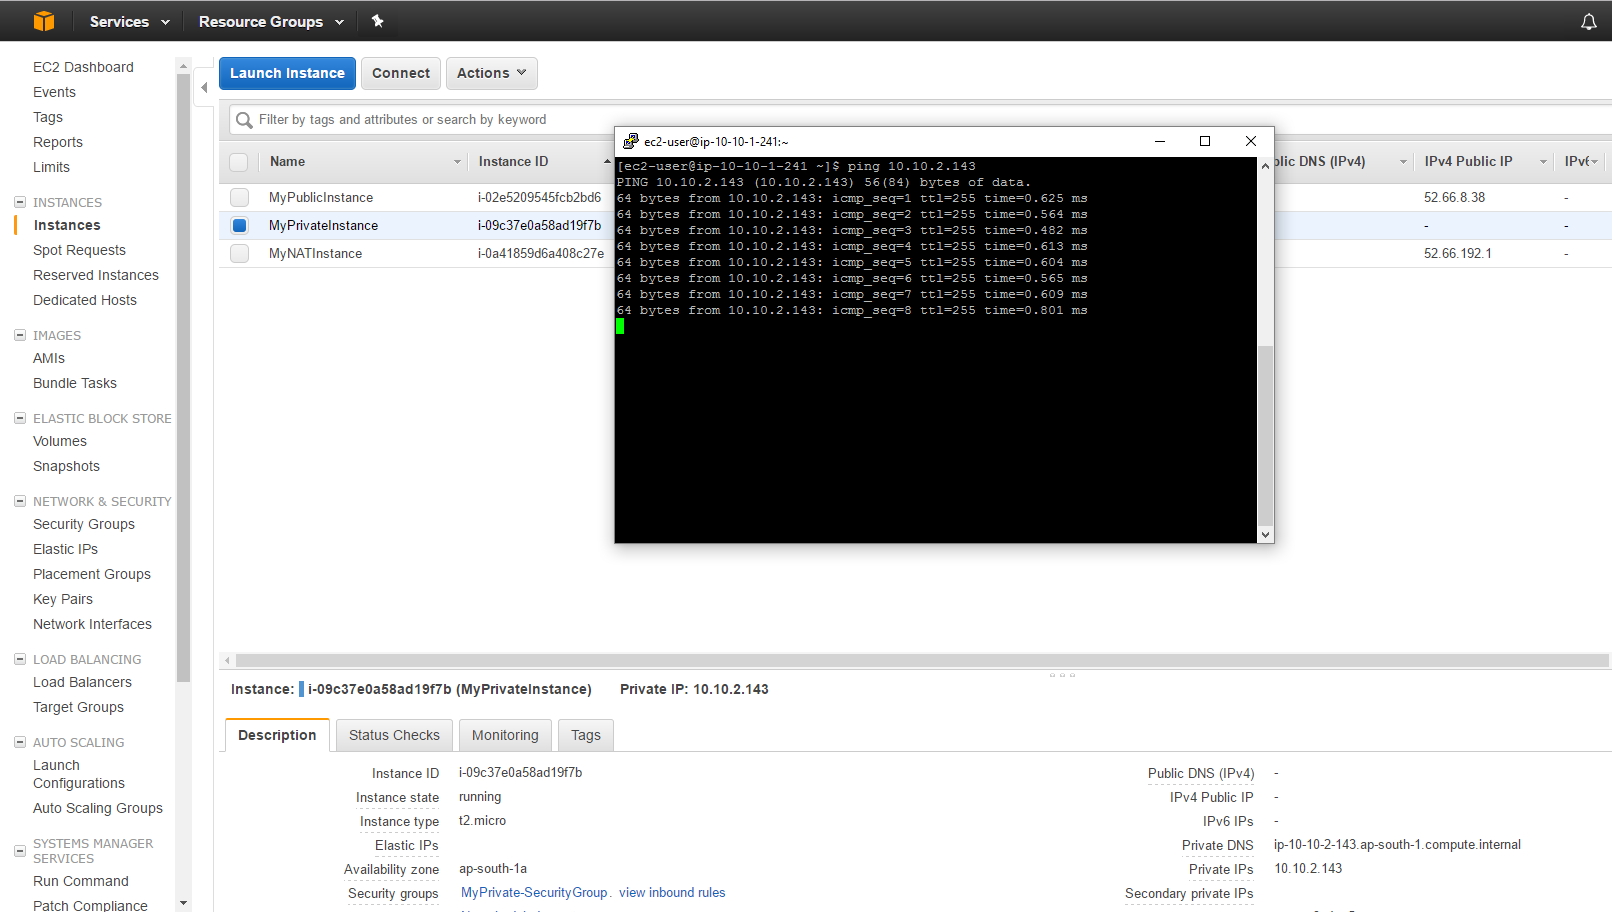
Here I found the Private IP for “MyPrivateInstance” in the AWS console (10.10.2.143), and confirmed that the two instances have imcp connectivity by running: ping 10.10.2.143 From my SSH session.
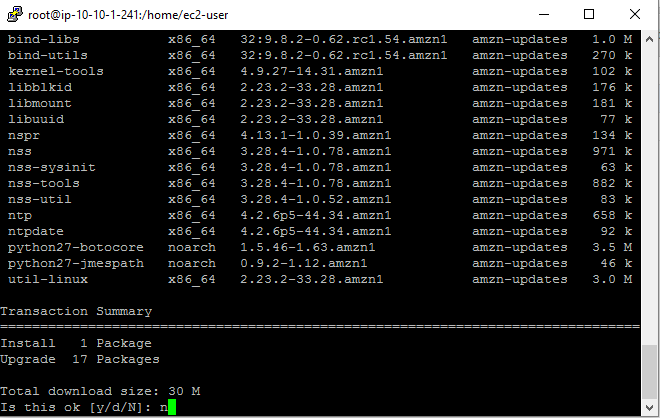
I now confirm internet connectivity by running: sudo su yum update (the quick amongst us will realise just by virtue of logging into this instance we confirmed internet connectivity, but it never hurt to be thorough.)
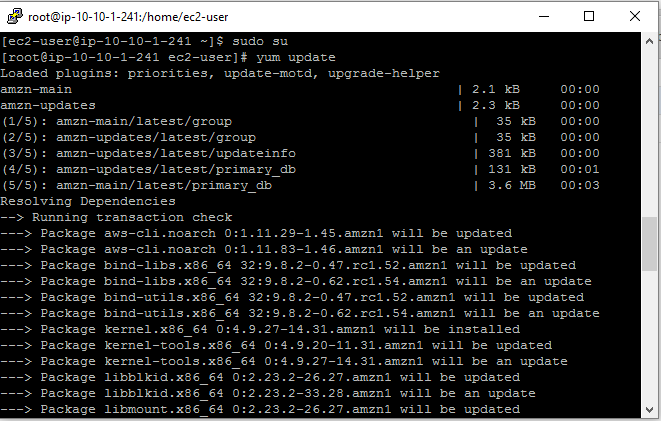
Here I will enter “n” as I am not really interested in the update, I just wanted to verify a connection to the internet.
We are half way people! Now to test the private instance! Here we locate the .pem file we created earlier.
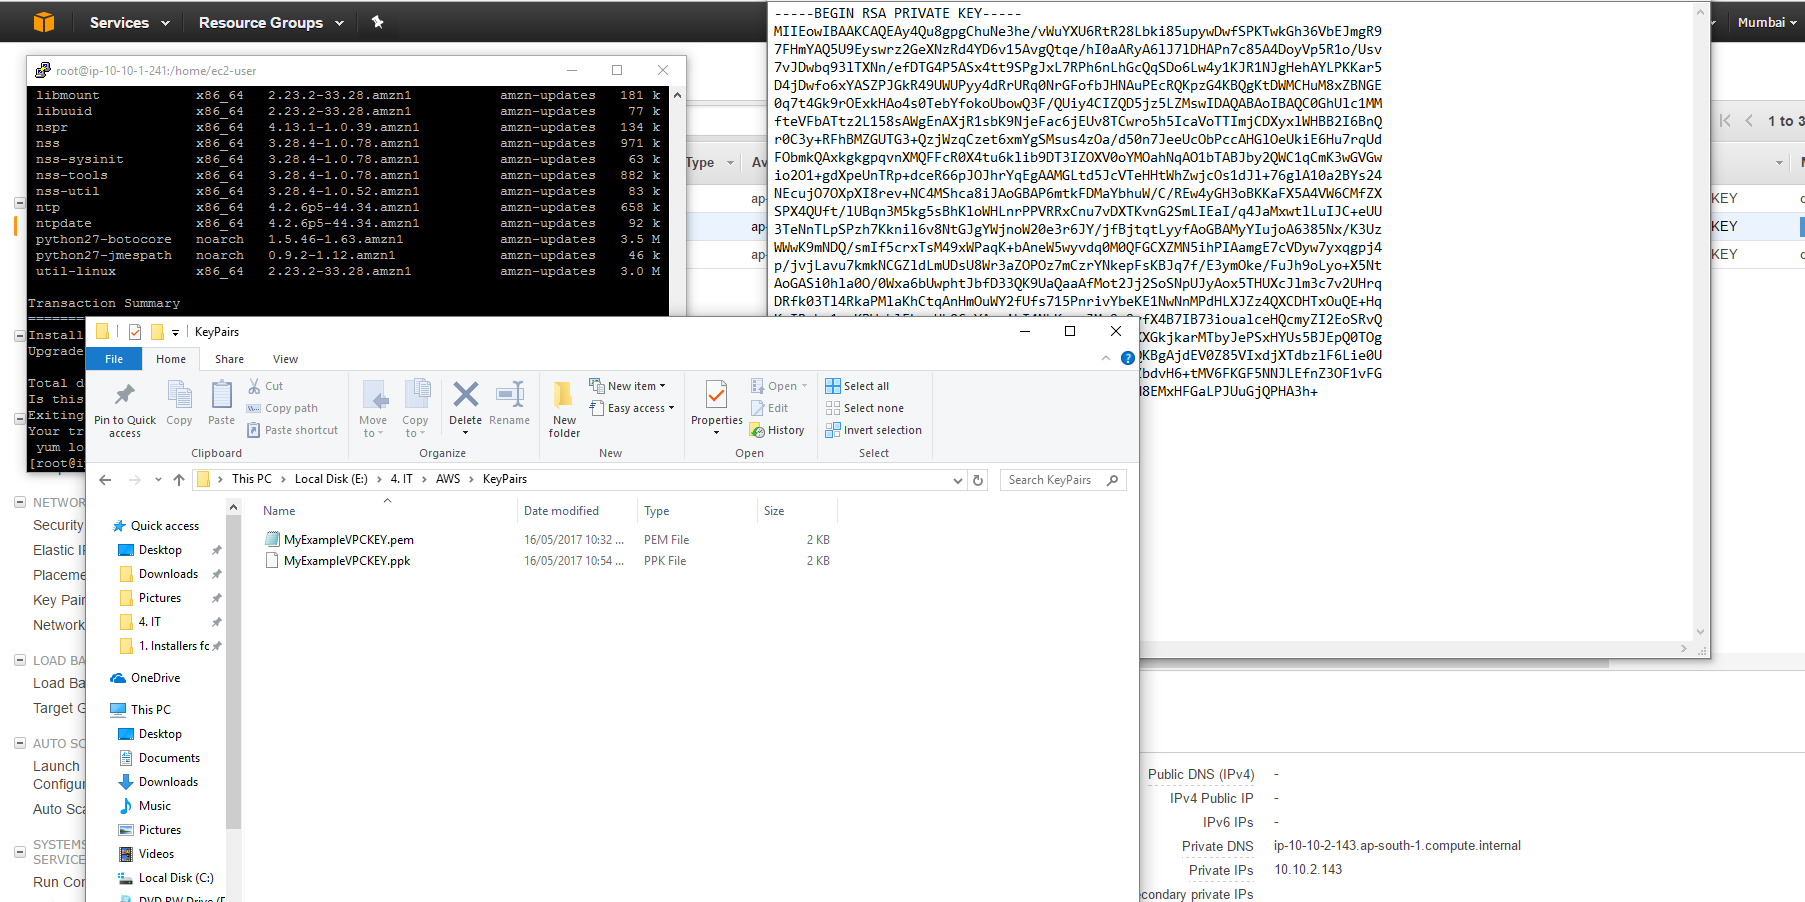
Open it with your text editor of choice and copy the contents, making sure not to copy any excess whitespace. (normally I would do this with WinSCP, or just scp in Linux, but this was the “quick and dirty way I got it going before my exam)

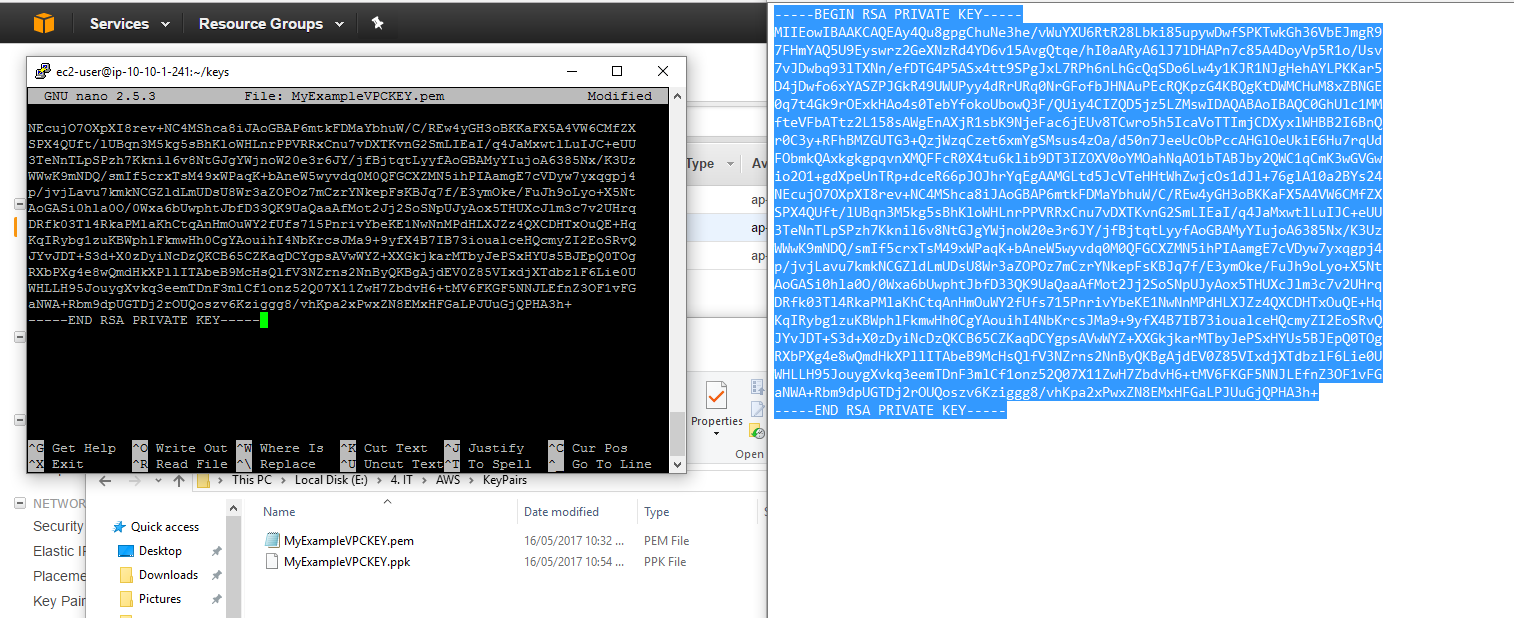
Type the following commands: cd keys/ touch MyExampleVPCKEY.pem nano MyExampleVPCKEY.pem
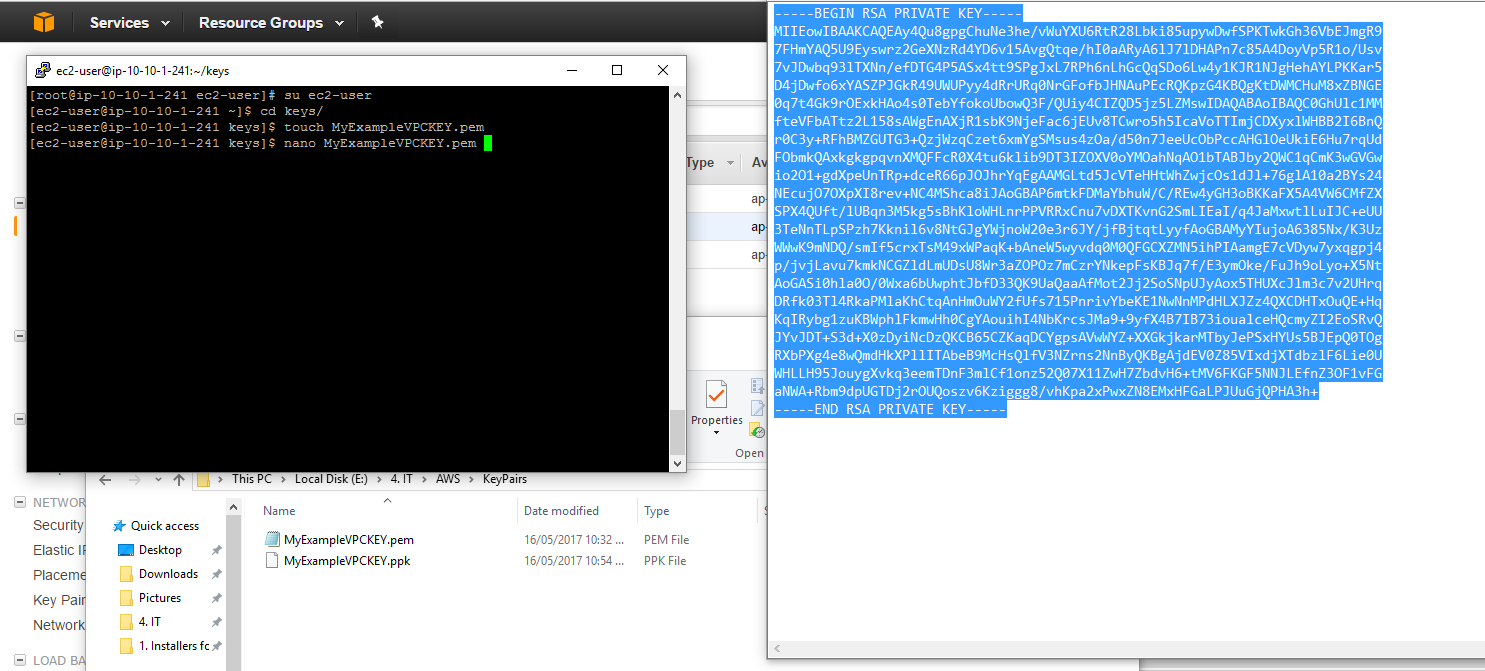
Here we have the .pem file open.
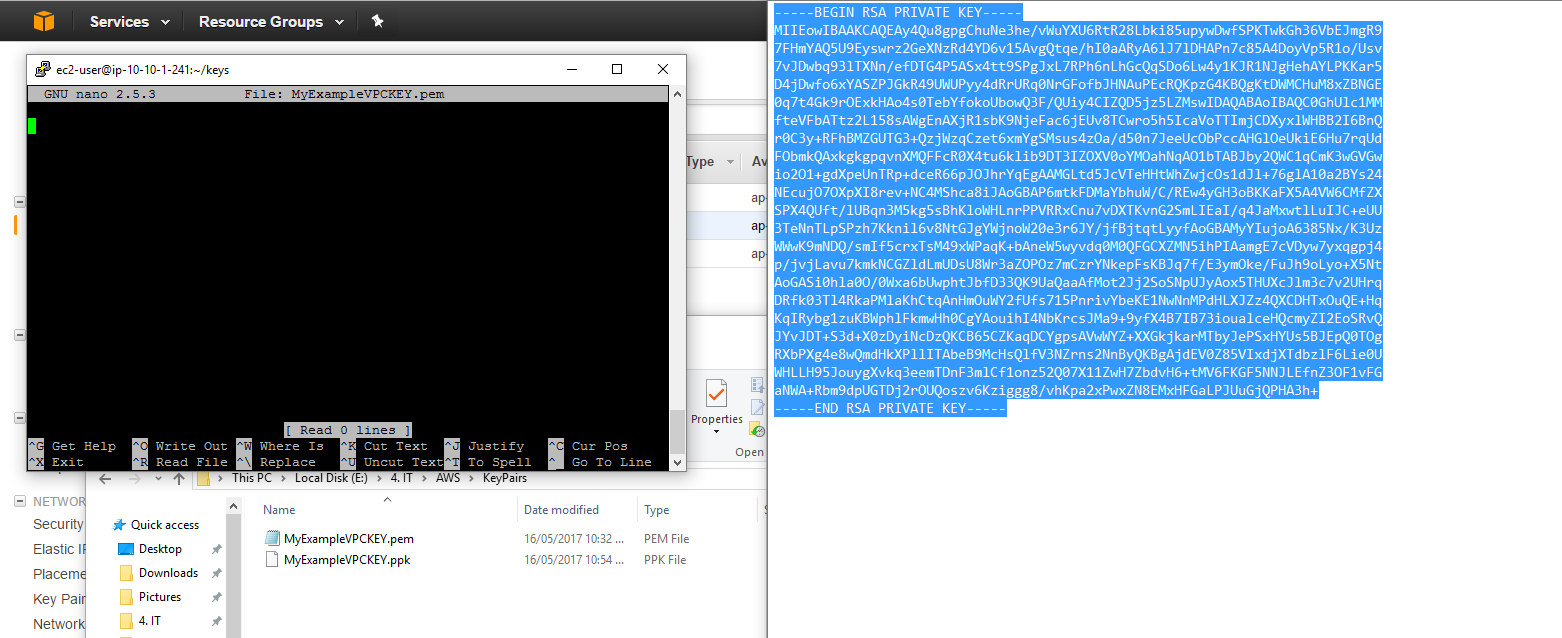
Paste the contents of the .pem file we copied into the new file via the SSH window. (Make sure to trim any whitespace from the start and end of the file)
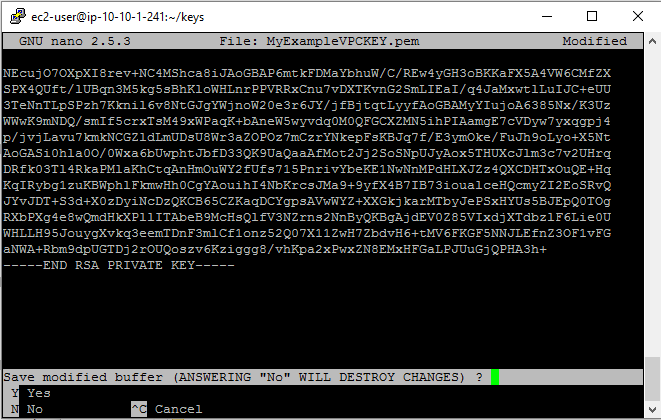
Save the file in nano using the following commands: Ctrl + O Y
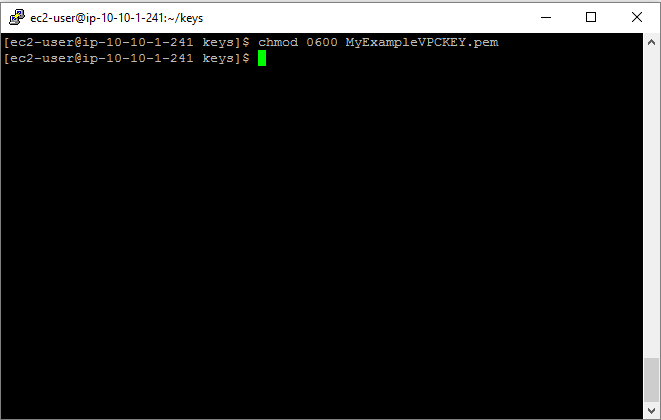
Run the following commands to set the appropriate permissions on the .pem file: chmod 0600 MyExampleVPCKEY.pem
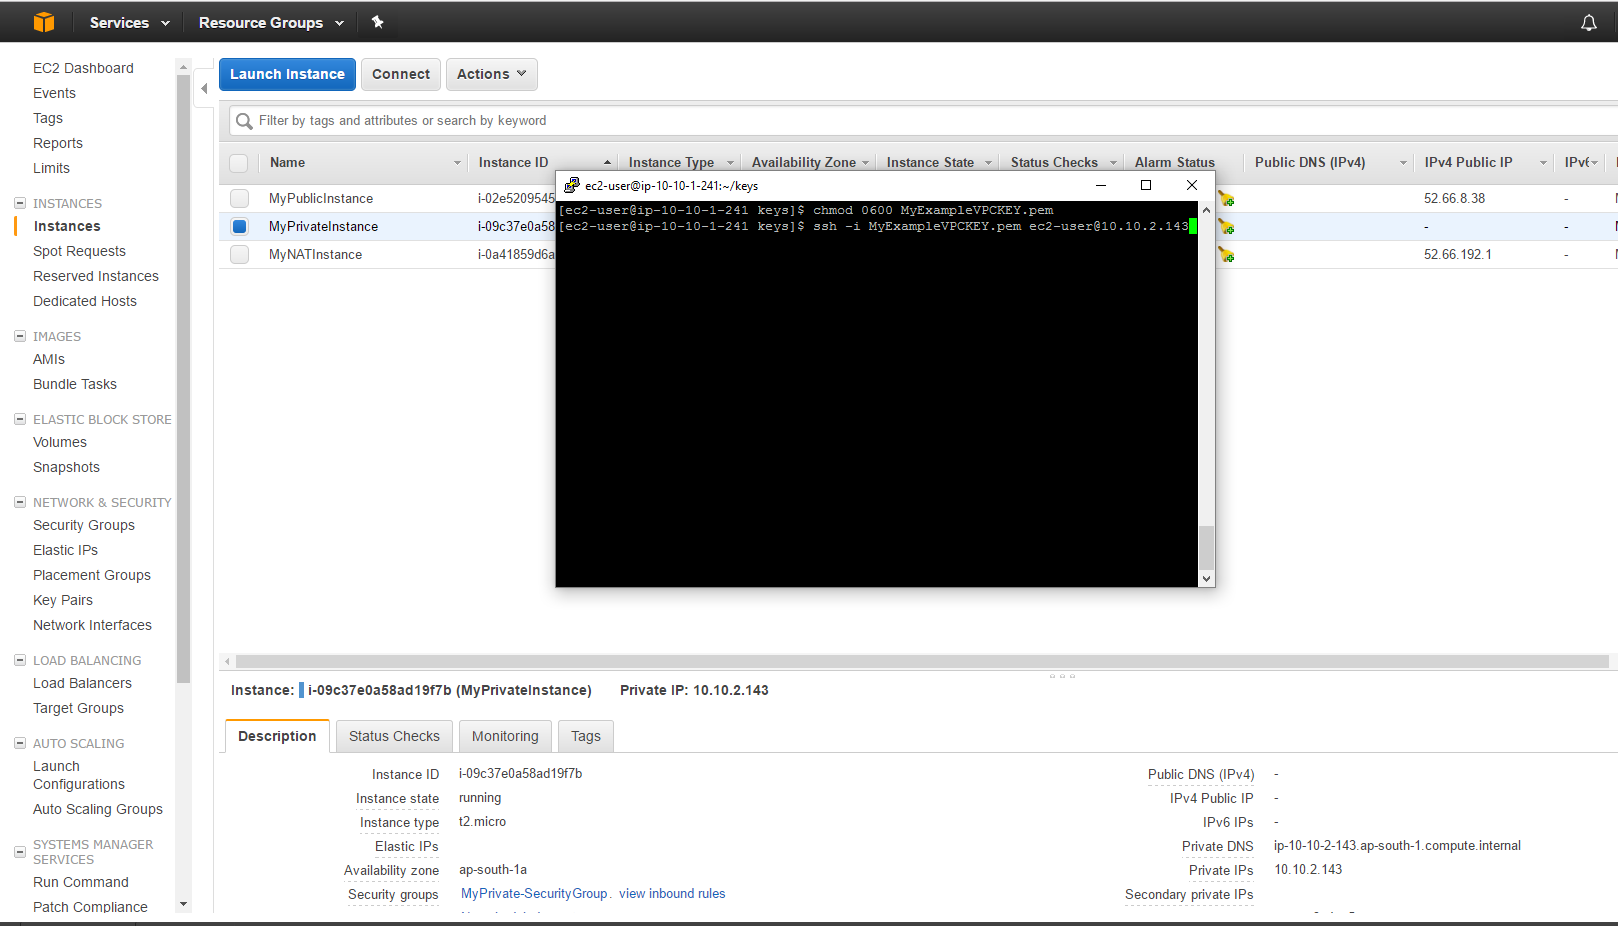
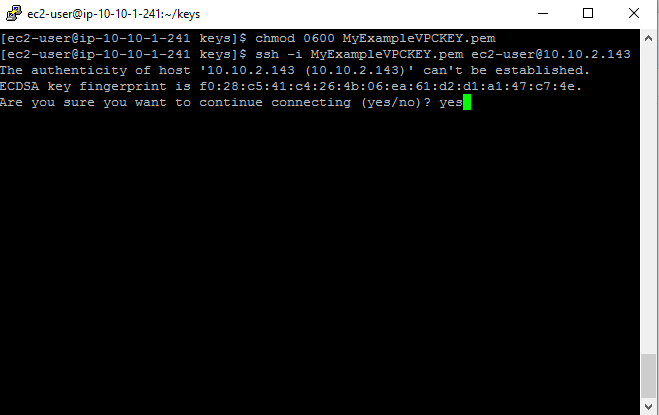
Here we run the following, to open another SSH session (to our private instance) from our public instance SSH session (SSH-ception I know!) you will have to replace the IP address below with one from your “MyPrivateInstance”. ssh -i MyExampleVPCKEY.pem ec2-user@10.10.2.143
You should then see the below warning, accept the key by typing in “yes”.
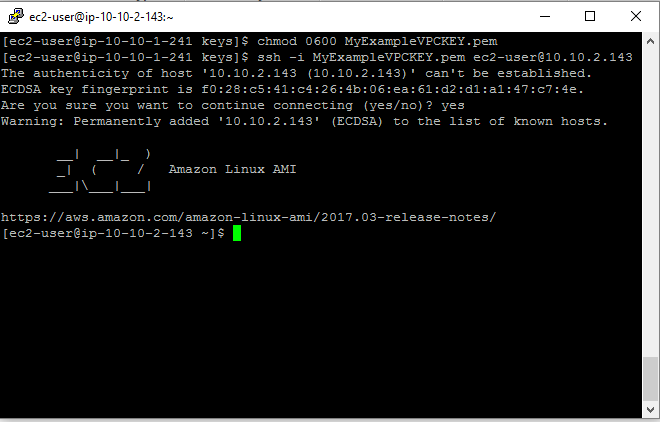
Your screen should now look like the below image, Notice how the top two lines state a 10.10.1.241 host (MyPublicInstance) while the bottom line states 10.10.2.143 (MyPrivateInstance), we are now inside our private instance!.
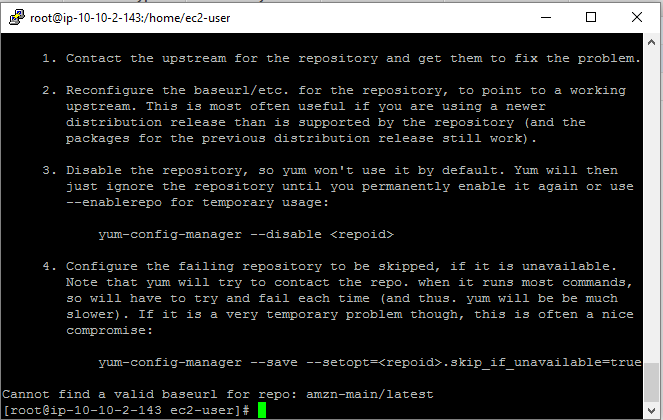
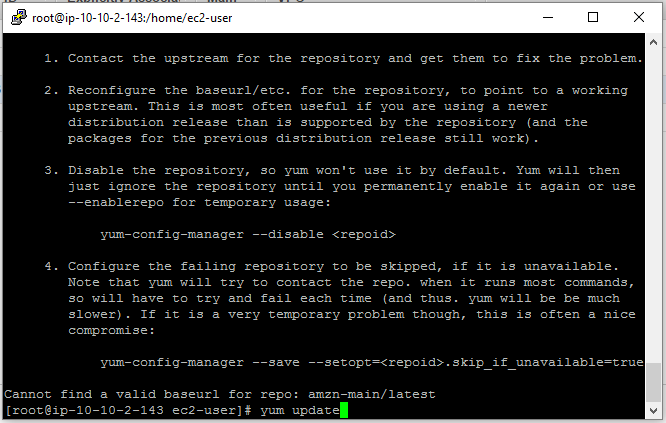
Run the following commands to test internet connectivity: sudo su yum update
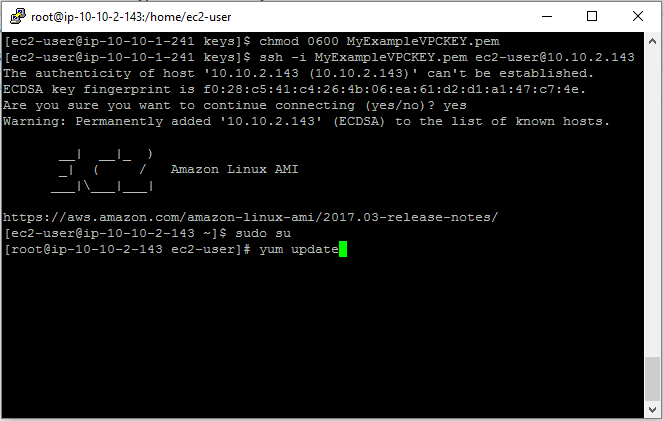
Here we run into a connectivity error, we have no access to the internet! fear not, this was intentional, we will resolve this soon.
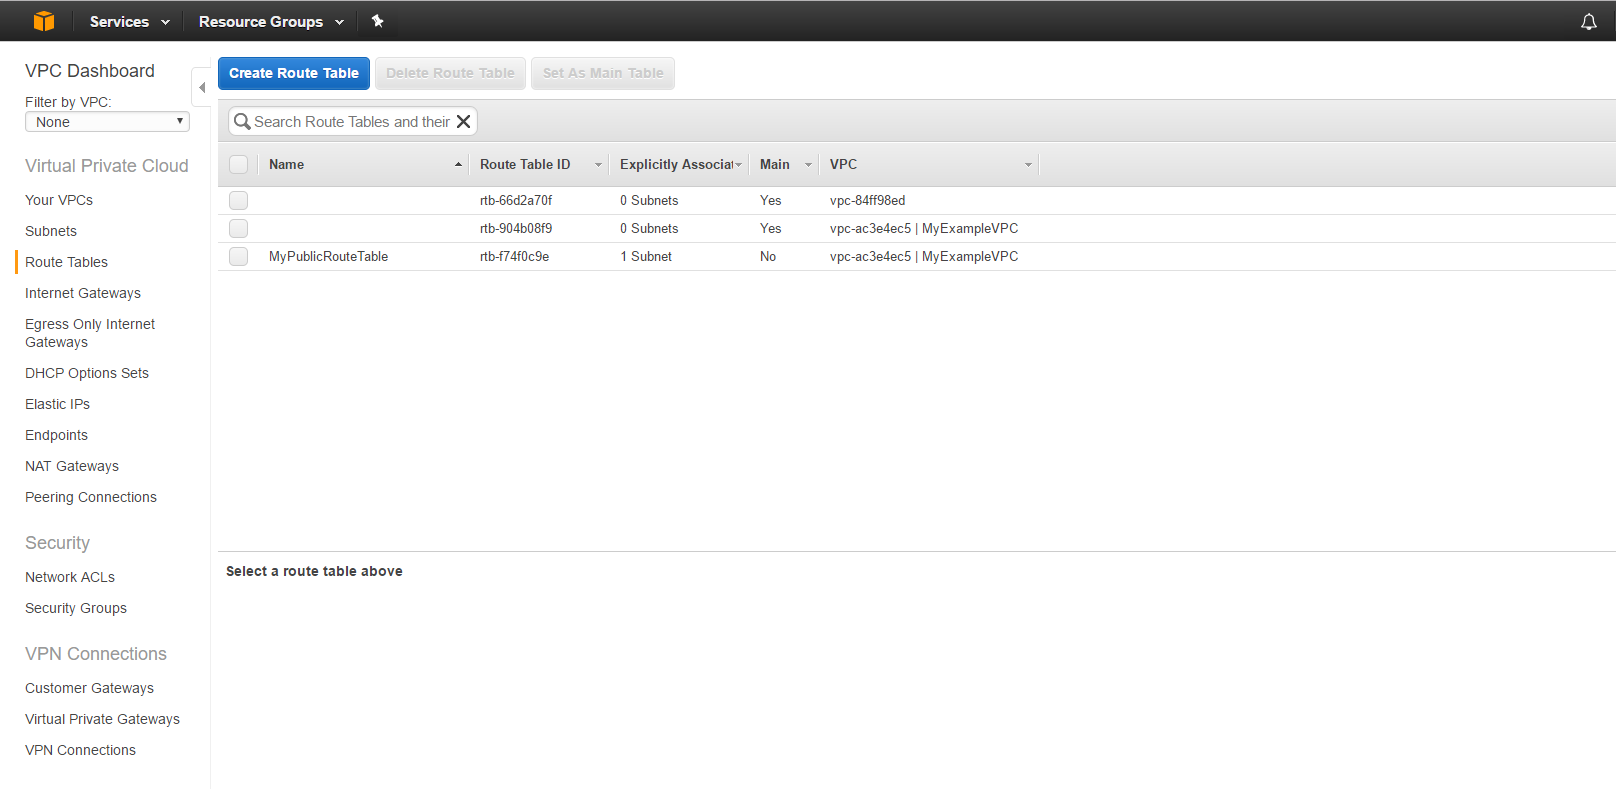
The reason we couldn’t reach out from “MyPrivateInstance” is that we haven’t yet set up a route for that traffic to reach out. Go back to the AWS console, inside the VPC dashboard and select the “Route Tables” tab, Click “Create Route Table”.
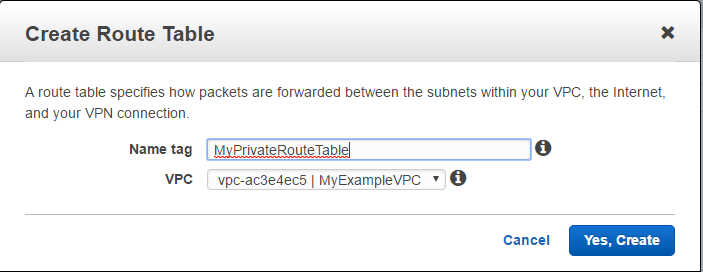
Enter the detials as seen below:
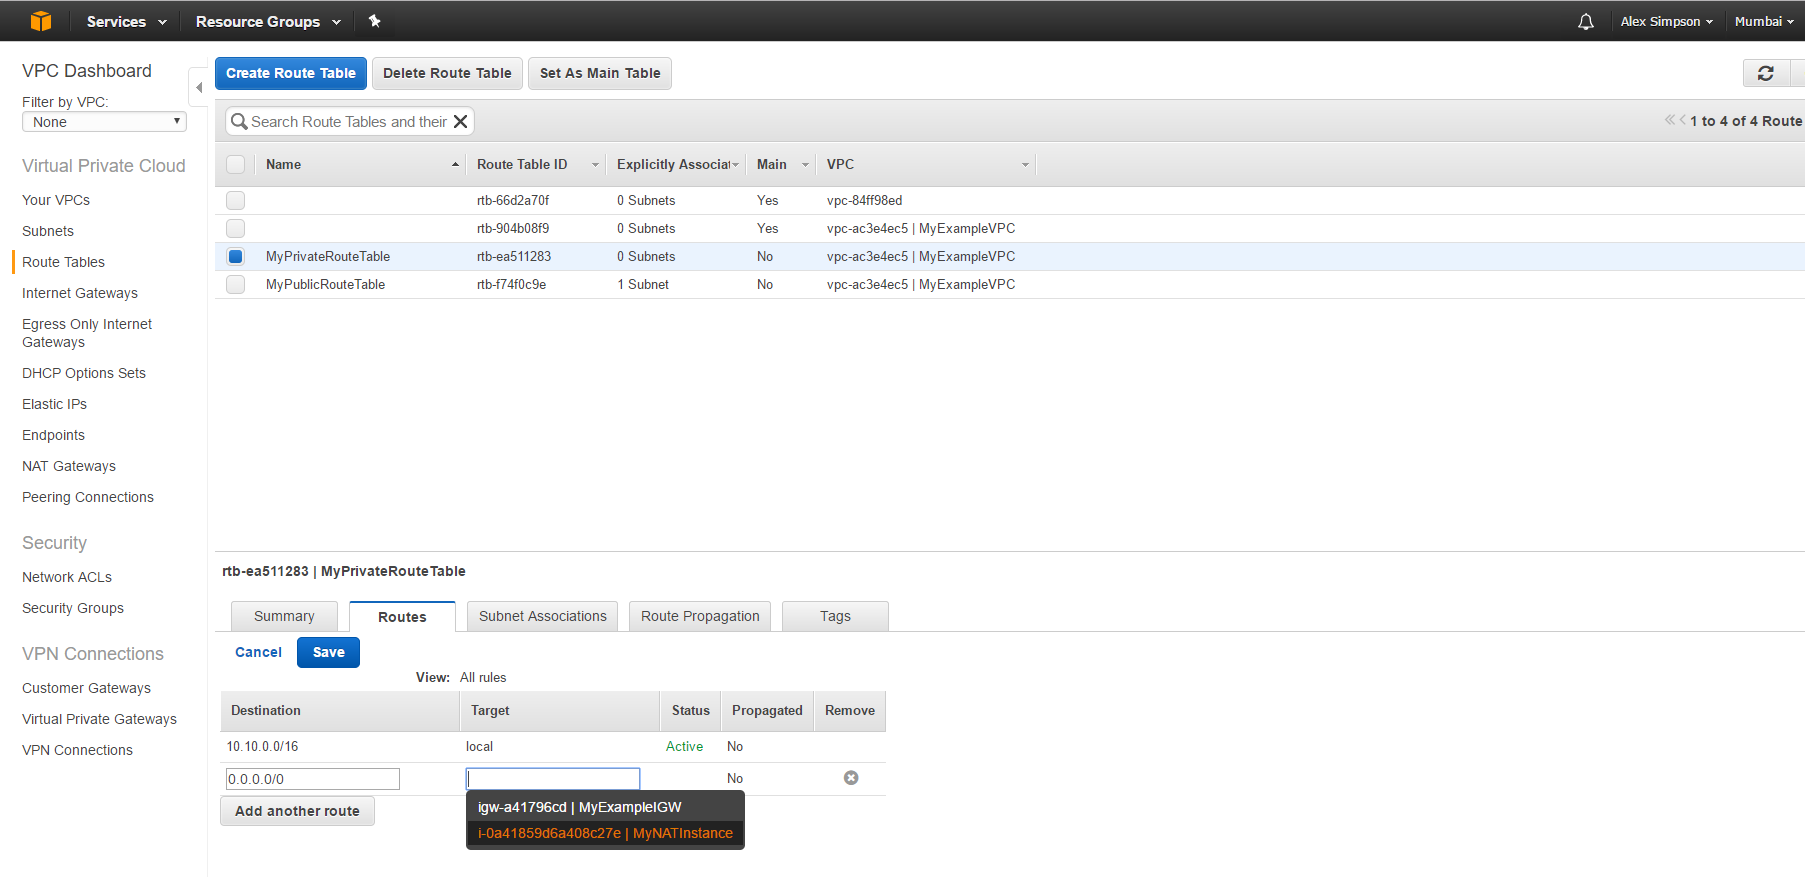
Once the Route Table is created, select the “Route” tab, then “Edit”, enter 0.0.0.0/0 (CIDR for everything) as the destination and MyNATInstance as the target, finally click Save.
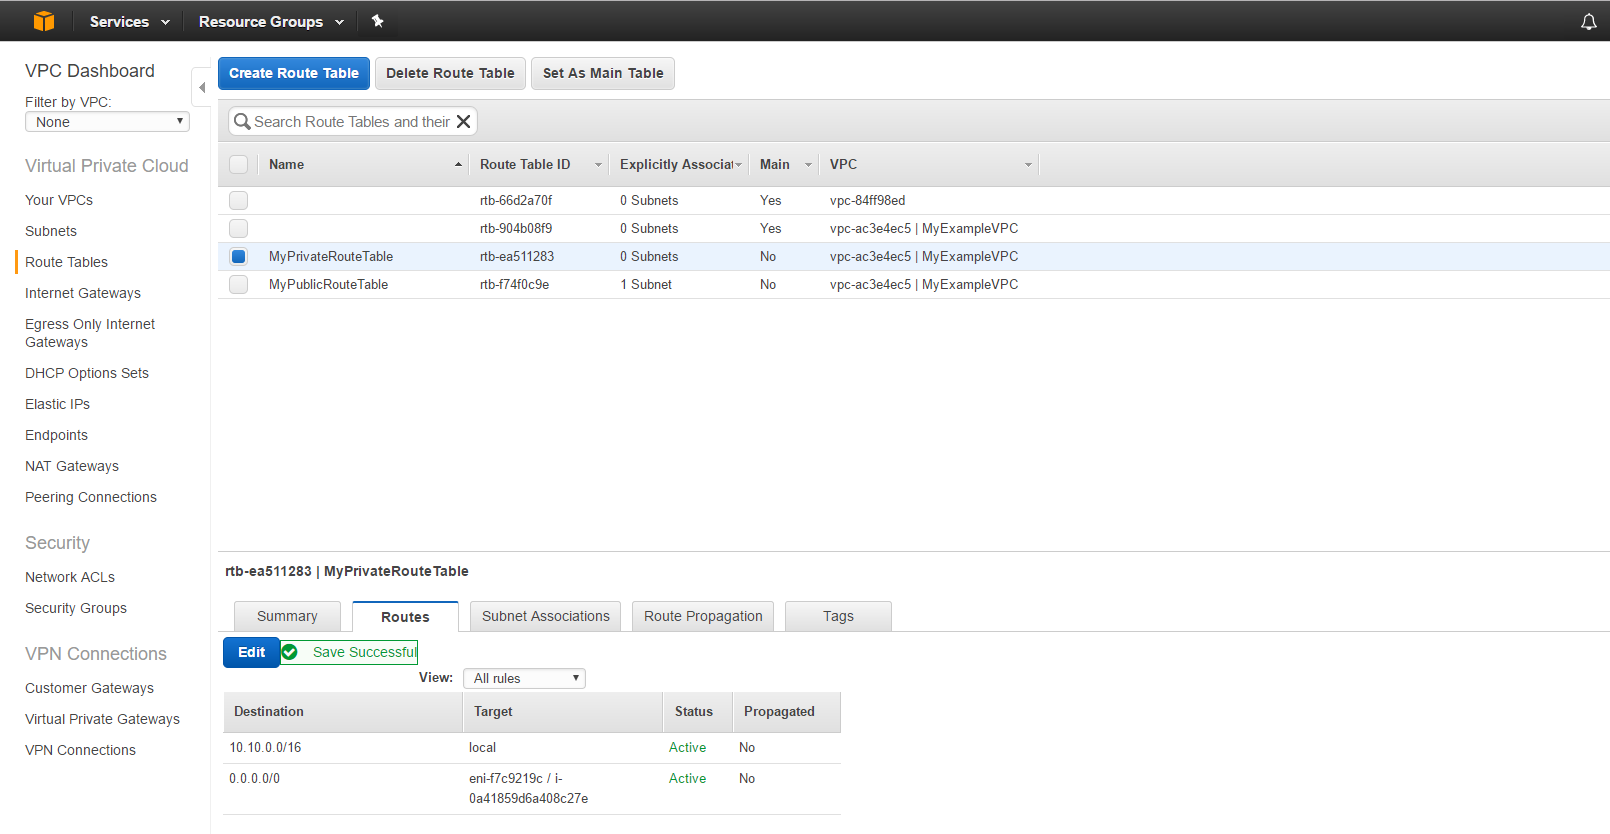
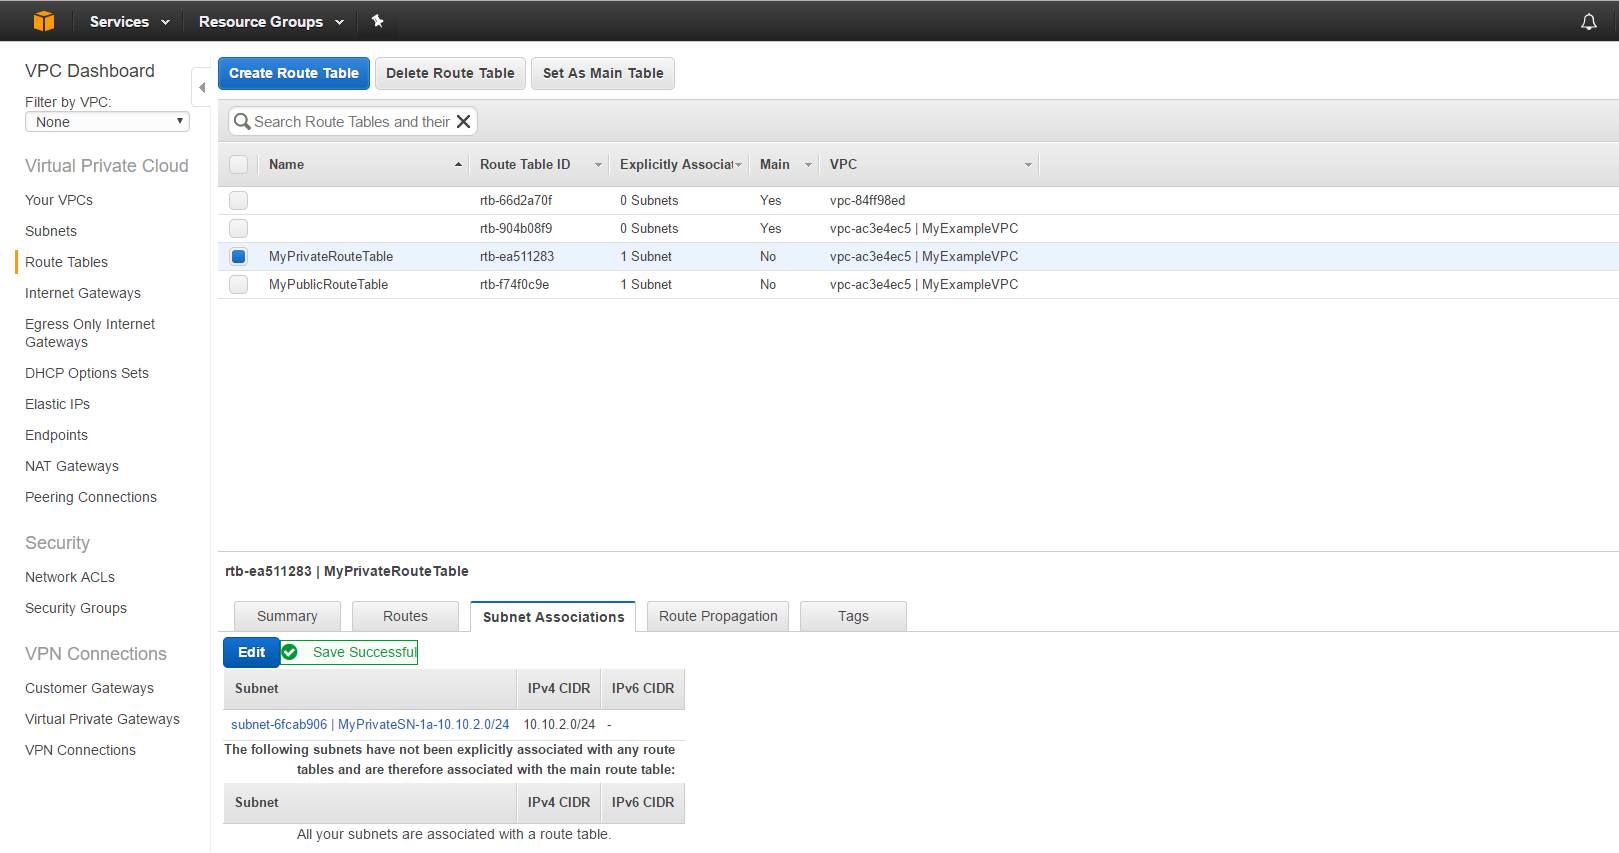
You should now see the green “Save Successful” just like my screenshot below.
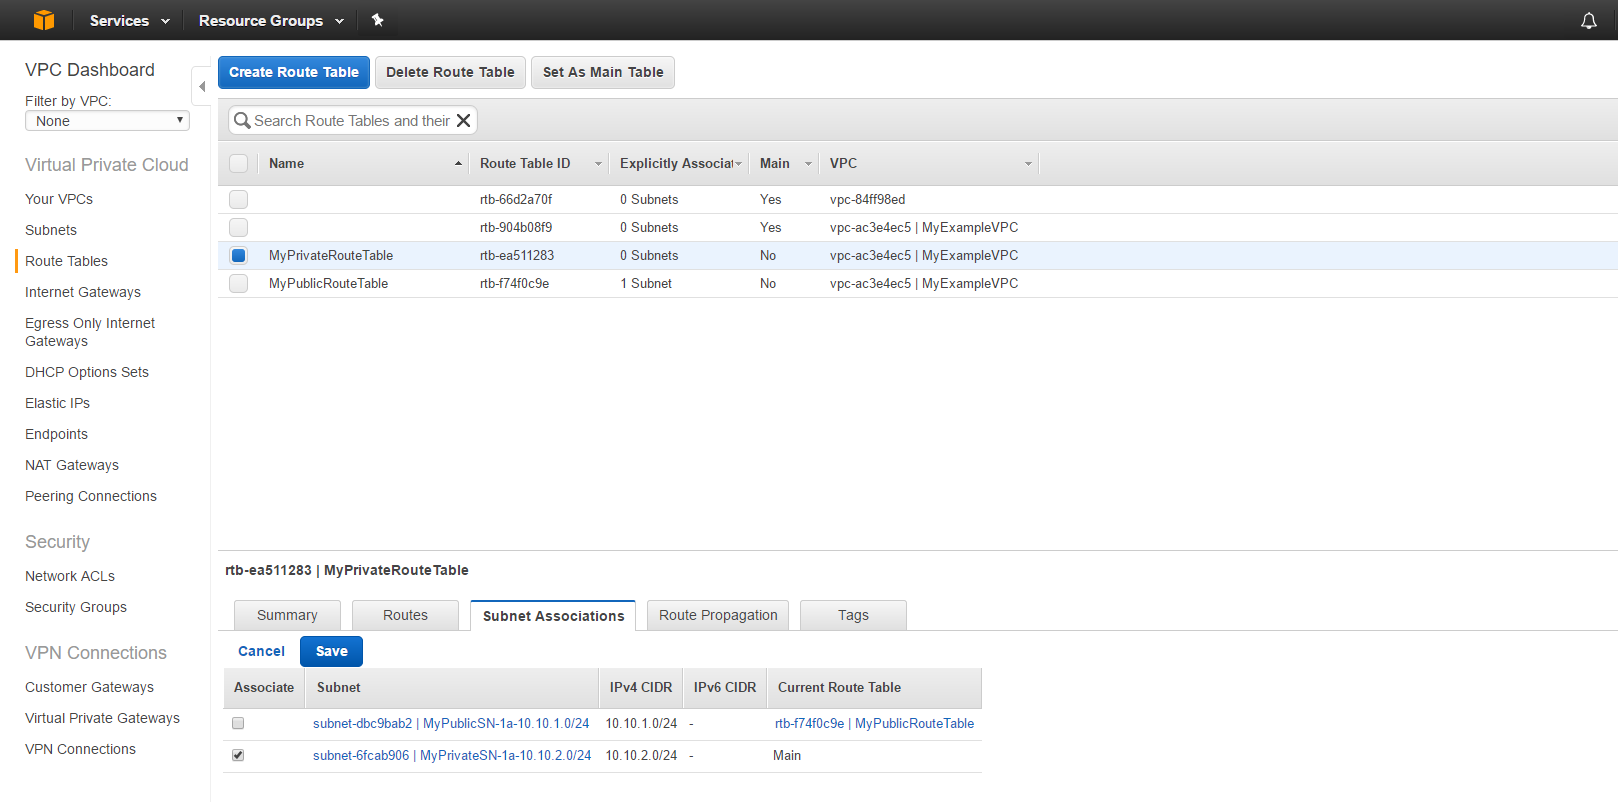
Move over to the “Subnet Associations” tab and select the checkbox next to MyPrivateSN-1a-10.10.2.0/24 then click “Save”.
You should now see the green “Save Successful” like my screenshot below. We should now be able to route from our private subnet through our NAT instance and to the internet!
Go back to your SSH session and try the update again: yum update
This time we should see yum accessing the appropriate repos as below.
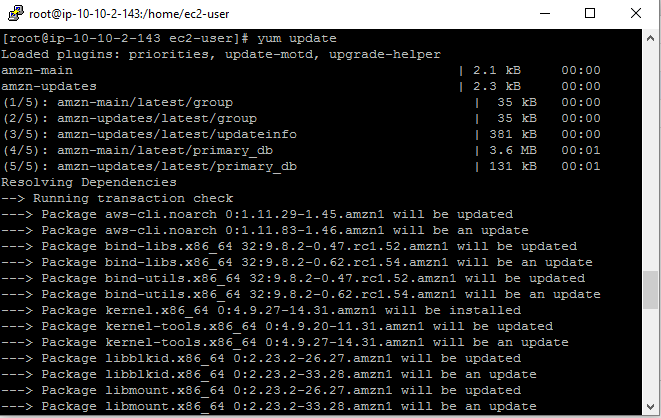
If your screen looks like mine, we have now verified internet connectivity from our private subnet through our NAT instance. Hurrah! If you have followed along this whole time you can give yourself a big pat on the back, as this process is one of the fundamentals that allot of AWS services depend on. Now we will go through cleaning out everything so we don’t get a nasty bill in a month or so.

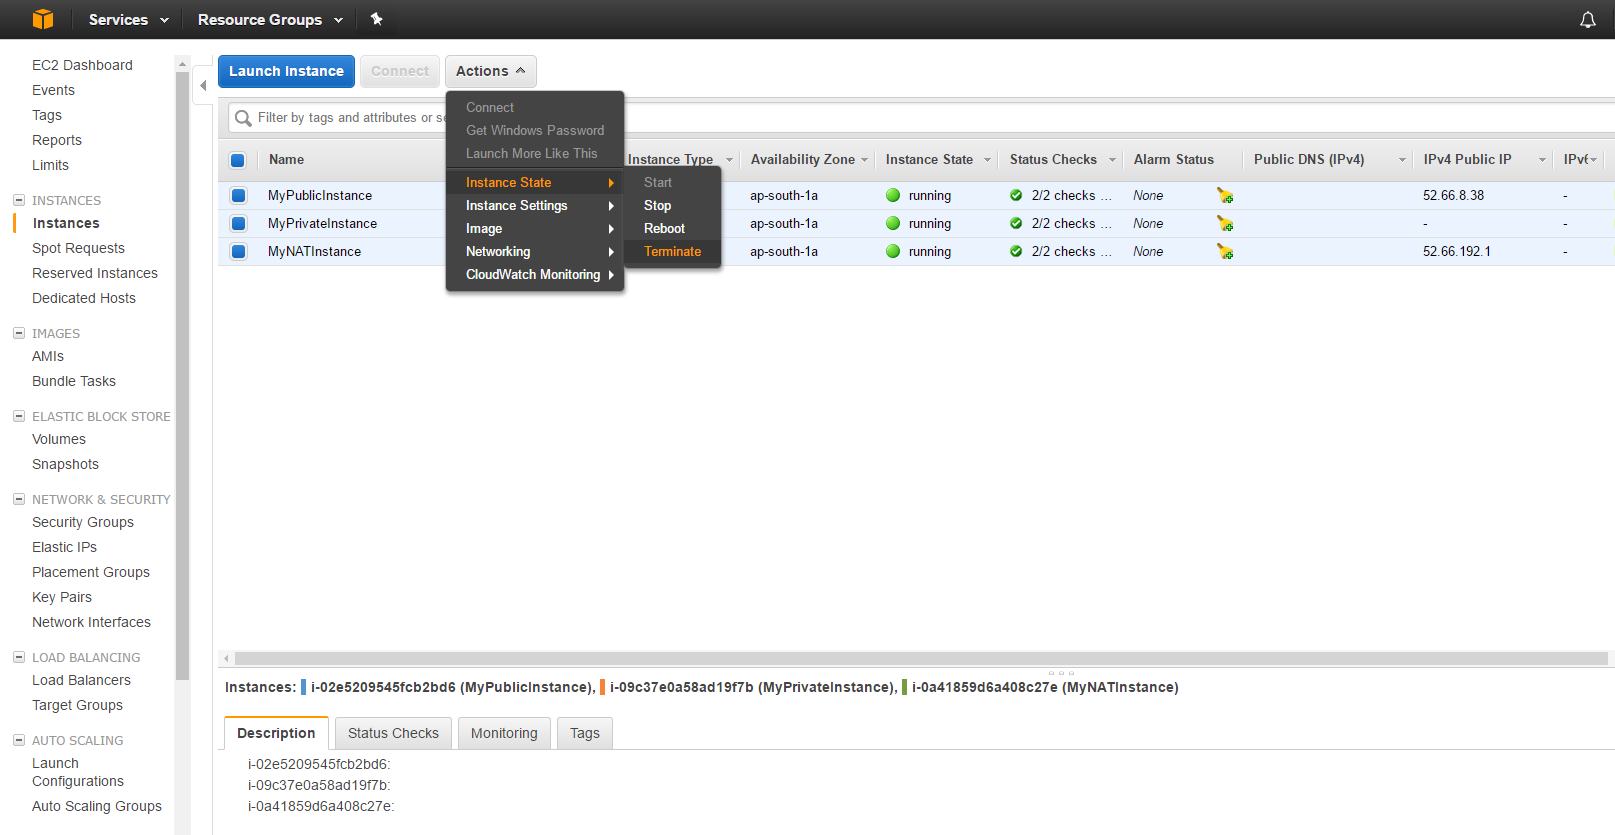
Navigate to the “EC2 Dashboard” and down to the “Instances” tab, select all three instances we used for this tutorial, click “Actions”, then “Instance State” and finally “Terminate”.
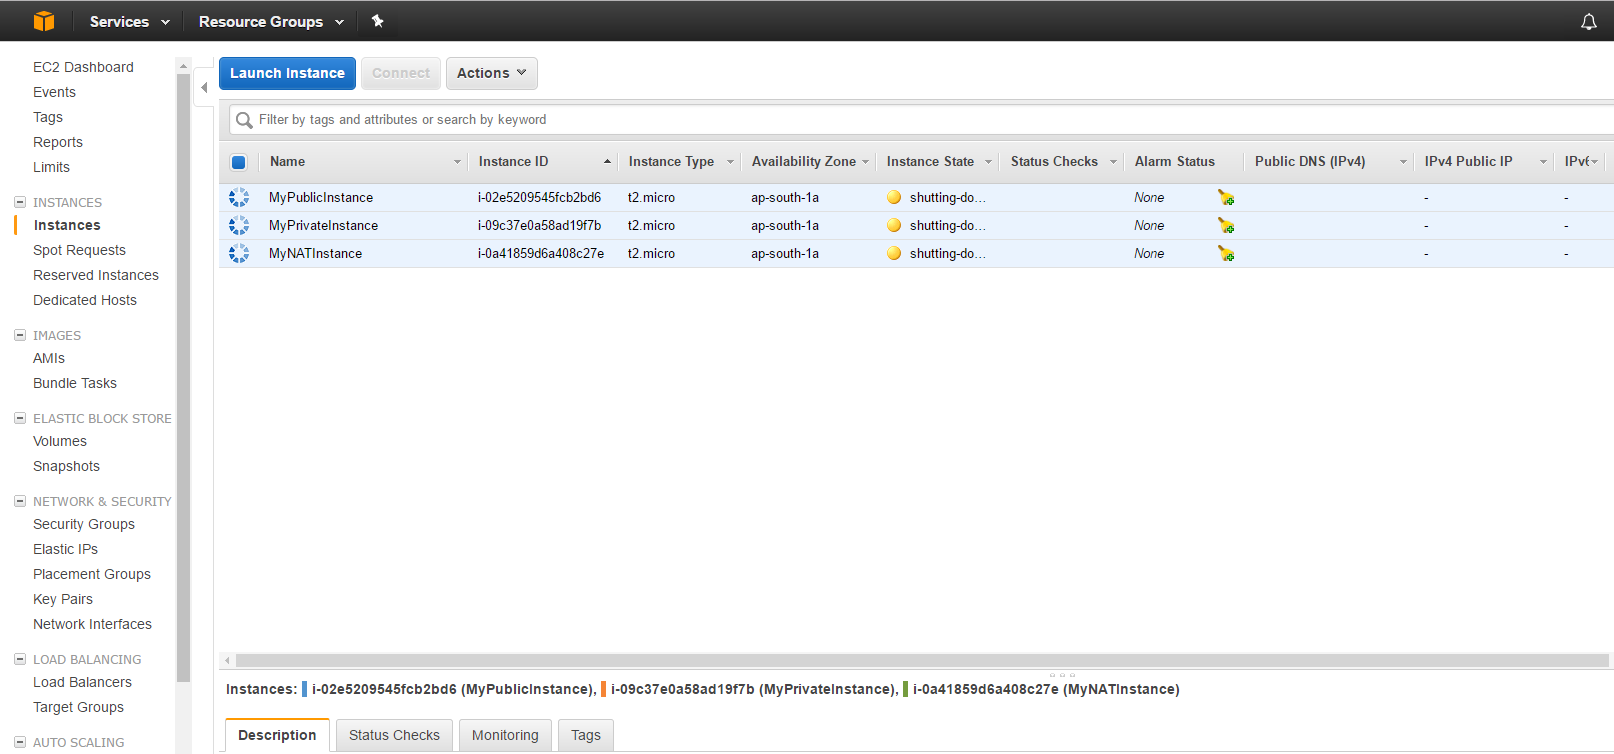
You should see all the Instances go from active to shutting down to terminated (it may take some time).
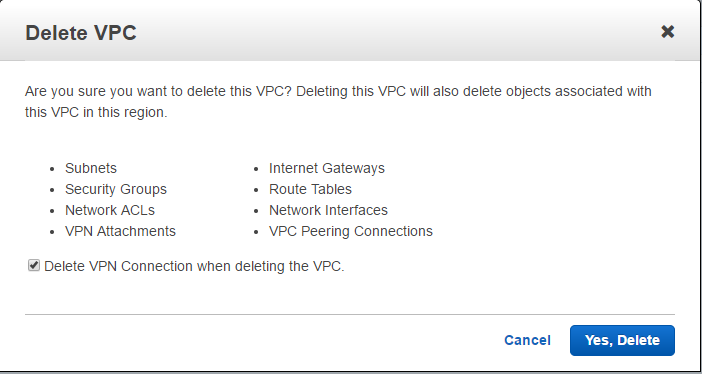
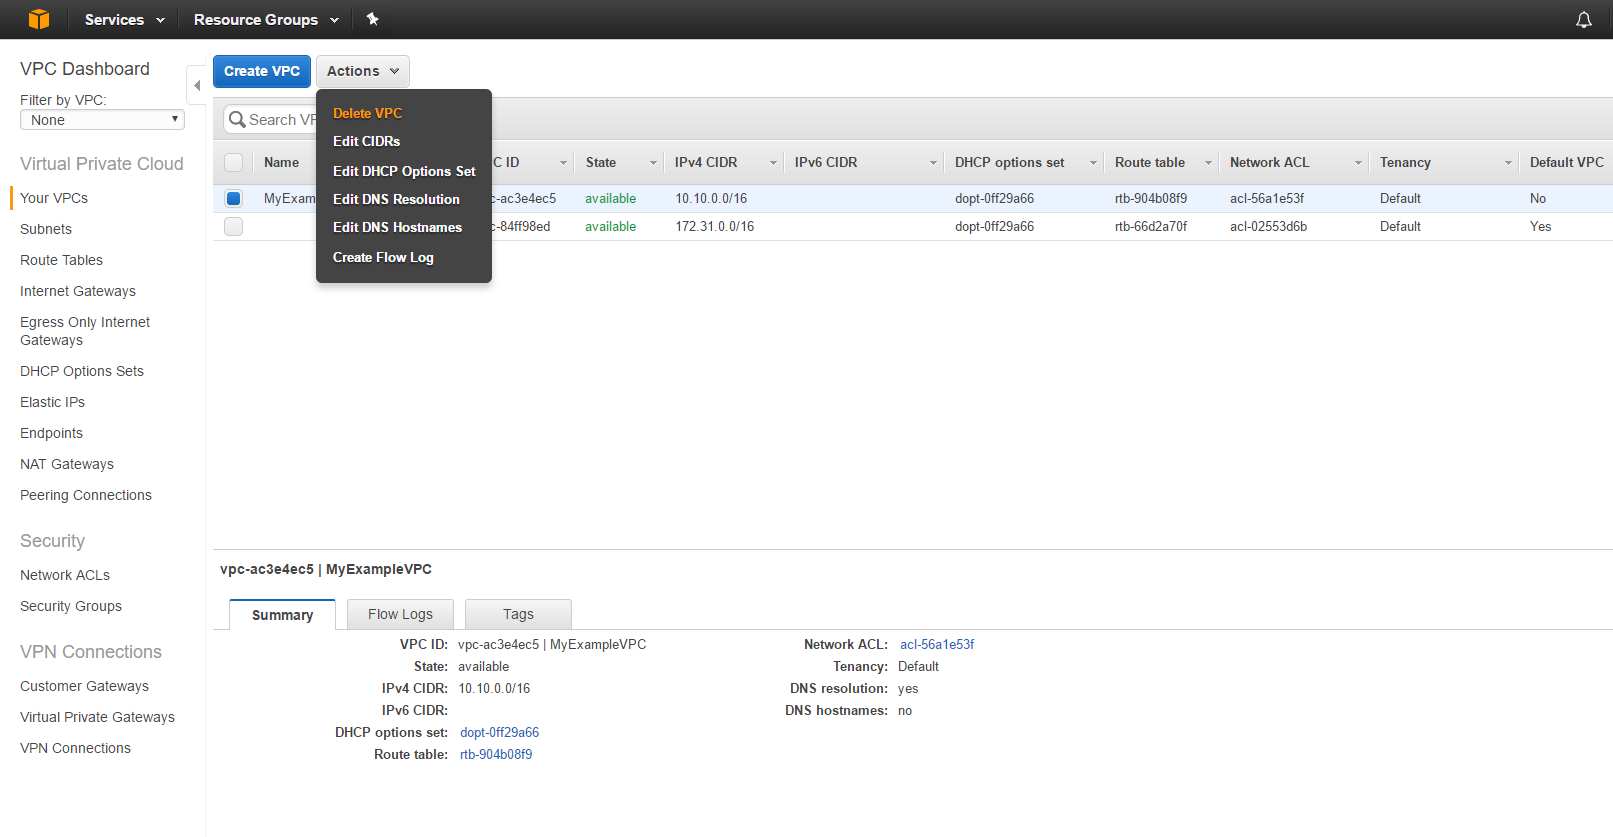
Navigate to the “VPC Dashboard” service, select “MyExampleVPC” click “Actions” then Delete VPC.
Accept the warning and click “Yes Delete”.